 how-to
How to Realign Garage Door Sensors Safely at Home
Quick Summary
To realign garage door sensors, first disconnect power and clear the door path. Then clean the lenses, loosen the mounting bracket, aim each sensor at the other, and tighten the screw until the lights stay steady. Finally, test the door with the wall button to confirm it closes safely.
- Disconnect power or turn off the breaker before touching any sensor.
- Clean the sensor lenses and clear away cobwebs or debris first.
- Sensors should sit about 6 inches above the floor and face each other.
- Confirm steady indicator lights before tightening the mounting bracket.
- Test the door with a 2-inch flat object to confirm it reverses.
Table of Contents
- Why Garage Door Sensors Go Out of Alignment
- Safety Steps to Take Before You Touch the Sensors
- Step-by-Step: How to Align Garage Door Sensors
- How to Align Garage Door Sensors on LiftMaster Openers
- How to Align Garage Door Sensors on Chamberlain Openers
- Why Your Garage Door Won't Close Even After Alignment
- Testing the Safety Reversal Before You Rely on the Door
- When to Stop Adjusting and Call Lone Star Garage Solutions
- Frequently Asked Questions
How to Realign Garage Door Sensors Safely at Home
Last Updated: November 11, 2026
Why Garage Door Sensors Go Out of Alignment
Garage door sensors are the small eyes beside the bottom of your door. They send an invisible beam across the opening, and if anything breaks that beam, the door stops and reverses. When the sensors drift out of line, the door may refuse to close or keep reversing for no clear reason. This problem is common, and it is often easy to diagnose, since many homeowners can realign garage door sensors with a few careful adjustments.
Sensors usually shift for a few common reasons:
- Bumps: A car bumper, a ladder, or a rolling trash bin can knock a sensor out of position.
- Vibration: Years of normal door movement can loosen the mounting bracket.
- Dust and cobwebs: Grime on the lens can block the beam even when the sensors are aimed correctly.
- Sun and heat: Texas sun can warp brackets and loosen screws over time.
Start by checking the simplest causes first. Wipe the lenses with a soft, dry cloth and clear away any cobwebs or debris. Then look at the two sensors to confirm they face each other and sit at about the same height.
Safety Steps to Take Before You Touch the Sensors
Working near a garage door can cause serious injury, so take these steps before you adjust anything:
- Disconnect power. Unplug the opener or turn off its breaker so the door cannot move while you work.
- Keep the door clear. Remove cars, bikes, and tools from the door's path.
- Never reach into the track. Keep hands and fingers away from the rollers, springs, and cables.
- Use a stable ladder. Do not stand on a chair or unstable surface to reach the sensors.
Watch out: the springs and cables under tension can cause severe injury if they fail. If you need to touch anything other than the sensor brackets, stop and call a professional.
Step-by-Step: How to Align Garage Door Sensors
Most sensor problems can be fixed with a few simple adjustments. Work slowly and check your progress after each change.
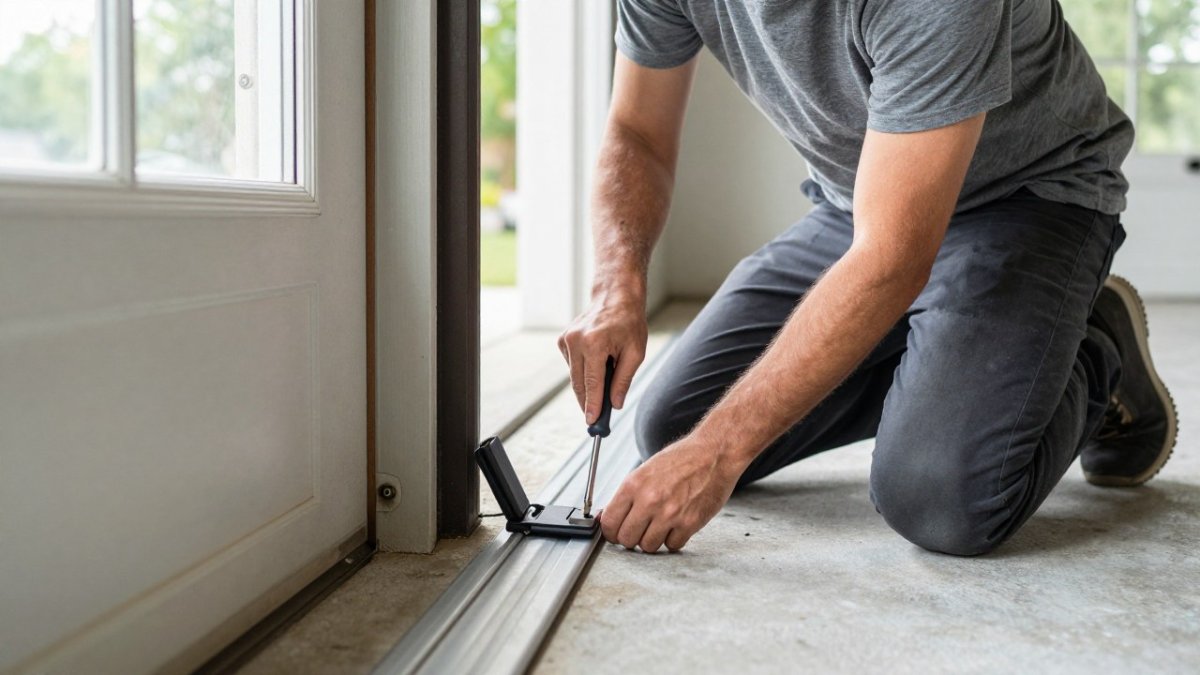
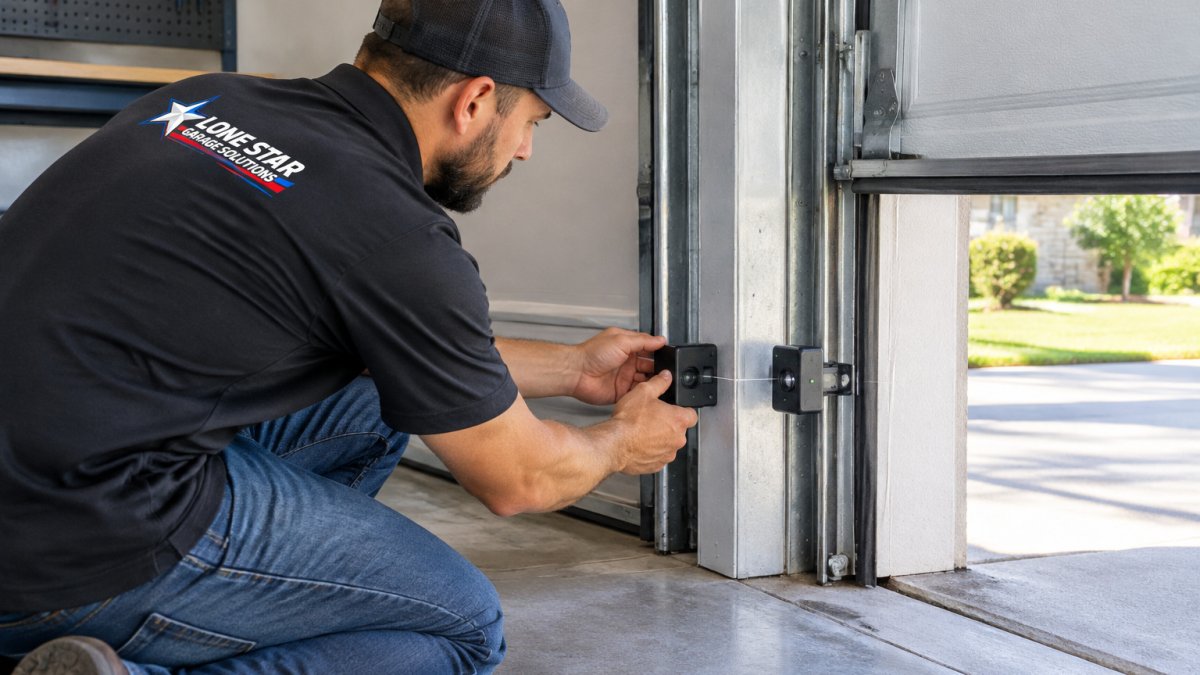
- Find the sensors. Locate the two small units on each side of the door, about 6 inches above the floor.
- Check the indicator lights. A steady light on each sensor usually means the beam is connected. A blinking light often signals misalignment.
- Loosen the mounting bracket. Use a screwdriver or wrench to loosen the screw so the bracket can move.
- Aim the sensors. Gently angle each sensor so it faces the other. Many people use the center of the lens as a guide.
- Tighten the screw. Once the lights stay steady, secure the bracket so it does not shift.
- Test the door. Reconnect power and close the door using the wall button, not the remote.
If the lights still blink after several attempts, the sensors may be damaged or wired incorrectly. At that point, the problem is no longer simple alignment.
How to Align Garage Door Sensors on LiftMaster Openers
LiftMaster openers usually show sensor status through the light on each sensor unit. Many homeowners notice a steady green or amber light when the sensors are aligned. Check your owner's manual for the exact light pattern for your model, since LiftMaster has produced many versions over the years.
When adjusting a LiftMaster system, focus on the bracket screws and the lens angle. Make small changes, then recheck the lights and test the door with the wall button. If you can't find a clear light pattern in your manual, we recommend a professional look at the system.
How to Align Garage Door Sensors on Chamberlain Openers
Chamberlain systems follow the same basic process: clean the lenses, loosen the bracket, aim the sensors, and tighten them again. Like LiftMaster, Chamberlain models differ in their light behavior, so confirm what each light means in your manual before you assume something is wrong.
A common mistake is adjusting the sensor only by eye while the door is closed and the opener is still connected to power. Disconnect power first, make your adjustments, then reconnect and test carefully.
Why Your Garage Door Won't Close Even After Alignment
Sometimes the sensors look correctly aimed, the lights are steady, and the door still refuses to close or keeps reversing. For broader steps, see our guide on fixing a broken garage door. When that happens, misalignment is probably no longer the cause.
Start with the sensor wiring. Look at where the low-voltage wires run from each sensor back to the opener. Check for wires that are pinched in the door track, rubbing against a moving part, or cut where they pass through a bracket or the door's edge.
Next, consider sunlight. Direct afternoon sun falling into the sensor lens can wash out the infrared beam, especially on west-facing garages. Shade the lens with a small cardboard shield, or check whether the problem appears only at certain times of day. This is a common cause that is easy to mistake for misalignment.
Then look at the door itself. A bent track, a roller stuck in a track section, or a door that binds at one point in its travel can make the opener think it has hit an obstruction. Operate the door by hand only when the opener is disconnected, and watch for a spot where it resists or drops unevenly.
Finally, consider a faulty sensor or opener logic. If you suspect interference from remotes or nearby devices, our guide on troubleshooting garage door remote signal interference walks through those checks.
Stop and call a professional if you find damaged or frayed wiring, a loose or unstable bracket that cannot be secured, a track that is bent or out of square, or a door that reverses repeatedly without any visible obstruction. These are beyond safe DIY repair. A qualified garage door technician can check the wiring, sensors, track, and opener together.
Testing the Safety Reversal Before You Rely on the Door
After any sensor adjustment, the door is not ready for everyday use until you have confirmed two separate things. First, the sensors must detect an obstruction in the beam. Second, the opener must respond to that detection by reversing the door. A door can close properly on a clear path and still fail one of these checks, which is why a simple "it closes fine" test is not enough.
You will need a flat, rigid object about 2 inches tall, such as a piece of 2x4 lumber, laid flat on the floor in the center of the door opening. Keep your hands and feet clear of the door path during every test.
Test 1: Beam detection. With the door fully open, wave the flat object slowly through the beam path about 6 inches above the floor. Then try the wall button to start a closing cycle. The door should refuse to close while the beam is interrupted. If the door starts to move and then stops or reverses before you place any object, the beam is still misaligned or receiving false signals.
Test 2: Reversal response. Place the object on the floor directly under the door's path and close the door with the wall button. The door should travel down until it contacts the object, then reverse back to fully open. This confirms the opener's reversal logic is working, not only the sensors.
Watch out: if the door reverses only partway, reverses late, or does not reverse at all when it meets the object, stop using the door and do not rely on the sensors for protection. Failed reversal is a safety issue, and it can indicate a fault in the opener or its force settings, not in the sensor alignment.
Keep a record of the results. If the beam test passes but the reversal test fails, the problem is likely in the opener's programming or force adjustment rather than in the sensor bracket, so further sensor adjustment will not solve it. Pass both tests consistently before returning the door to normal use, and call a professional if either one fails after you have rechecked the alignment.
Before you rely on the door, run these two tests to confirm both the sensors and the reversal work.
| Test | What to do | What a passing result looks like |
|---|---|---|
| Beam detection | Wave a 2-inch flat object through the beam about 6 inches above the floor, then press the wall button | Door will not close while the beam is interrupted |
| Reversal response | Place the flat object under the door path and close the door with the wall button | Door contacts the object, then reverses fully open |
| Repeat reversal test | Run the reversal test two more times | Reverses consistently on all three attempts |
| Failed reversal | Door reverses partway, late, or not at all | Stop using the door and treat it as a safety issue |
When to Stop Adjusting and Call Lone Star Garage Solutions
Call a professional if:
- The sensor lights stay off or keep blinking after several careful adjustments.
- The door reverses without any clear obstruction.
- The safety reversal test fails.
- You see damaged springs, frayed cables, or a bent track.
- You are uncomfortable working near the door or its tension components.
Lone Star Garage Solutions is a locally owned garage door company serving New Braunfels and nearby Central Texas communities. Contact us for a quote on any repair. Contact us for a quote today and get your door working safely again.
Frequently Asked Questions
Is there a trick to aligning garage door sensors?
There is no secret trick, but a few habits make the job much easier. Start by cleaning both sensor lenses with a soft, dry cloth, since dust and spiderwebs can block the beam even when the sensors are lined up. Then aim the two sensors at each other by eye, checking that the indicator lights on both units are steady rather than blinking. Mount both sensors about six inches above the floor on the same side of the door. Adjust one sensor at a time and make small movements, retightening the mounting screws only once the light stays solid. Work slowly and test the door after every adjustment.
My garage door sensors are misaligned. How can I fix them?
Start with the simplest causes first. Turn off the opener power, then clean both lenses and check for anything blocking the path between the sensors. Loosen the mounting screws or bracket just enough to move the sensor, aim it toward the other sensor, and watch the indicator lights. When both lights are steady, tighten the screws and restore power. Repeat the same process for the second sensor if needed. If the lights still blink or the door will not close after several careful attempts, the problem may be wiring or a faulty sensor, and a technician should take a look.
Why won't my garage door close even though the sensors are aligned?
Aligned sensors do not always mean a working safety system. Check that nothing is in the door path, such as a bike, a toy, or a shelf that has shifted. Confirm the sensor wires are secure and not pinched or damaged. Clean the lenses again, because a thin film of dust can interrupt the beam. Also make sure the sensors are mounted at the same height and facing each other, not tilted. If the door reverses as soon as it starts to close, the sensors are still detecting something or a wiring fault exists.
When should I call a garage door technician about sensor problems?
Call a technician if the sensor lights keep blinking after you have cleaned the lenses and realigned both units, if the wiring looks damaged or loose, or if the door reverses without any obvious obstruction. You should also call for help if you see signs of a larger spring, cable, or track problem, since those can make a sensor issue look worse than it is. You can contact Lone Star Garage Solutions for a quote on the repair.