 how-to
How to Measure Your Garage for Retractable Screens
Table of Contents
- Why Accurate Measurements Matter for Retractable Garage Screens
- What You'll Need Before You Start Measuring
- Measuring the Opening Width and Height
- Garage Door Screen Measurements: Checking Clearance Above and Around
- Retractable Garage Screen Clearance: Accounting for Tracks and Hardware
- Garage Screen Mounting Space: Inside-Mount vs. Outside-Mount
- Handling Uneven Floors and Out-of-Square Openings
- Recording Your Measurements and Next Steps
- Frequently Asked Questions
Last Updated: October 19, 2026
Why Accurate Measurements Matter for Retractable Garage Screens
Getting the right measurements is the foundation of a successful installation when you measure garage retractable screens properly.
At Lone Star Garage Solutions, we've seen installations go sideways because homeowners guessed at measurements. This guide walks you through the process, from basic width and height to the clearance checks most people overlook.
Proper measurements also save time and money: you won't order a screen that doesn't fit, and your installer won't need on-site adjustments.
What You'll Need Before You Start Measuring
Gather these tools before you begin:
- Metal tape measure (at least 25 feet long)
- Notepad or phone notes app (to record measurements)
- Level (a small hand level or smartphone level app)
- Helper (optional but helpful for holding the tape steady)
- Pen (to mark reference points if needed)
A metal tape won't sag or bend like cloth, so it delivers the accuracy you need. Write down every measurement as you take it, precision matters.
Measuring the Opening Width and Height
The opening width and height are your starting points. These two measurements define the overall size of your retractable screen.
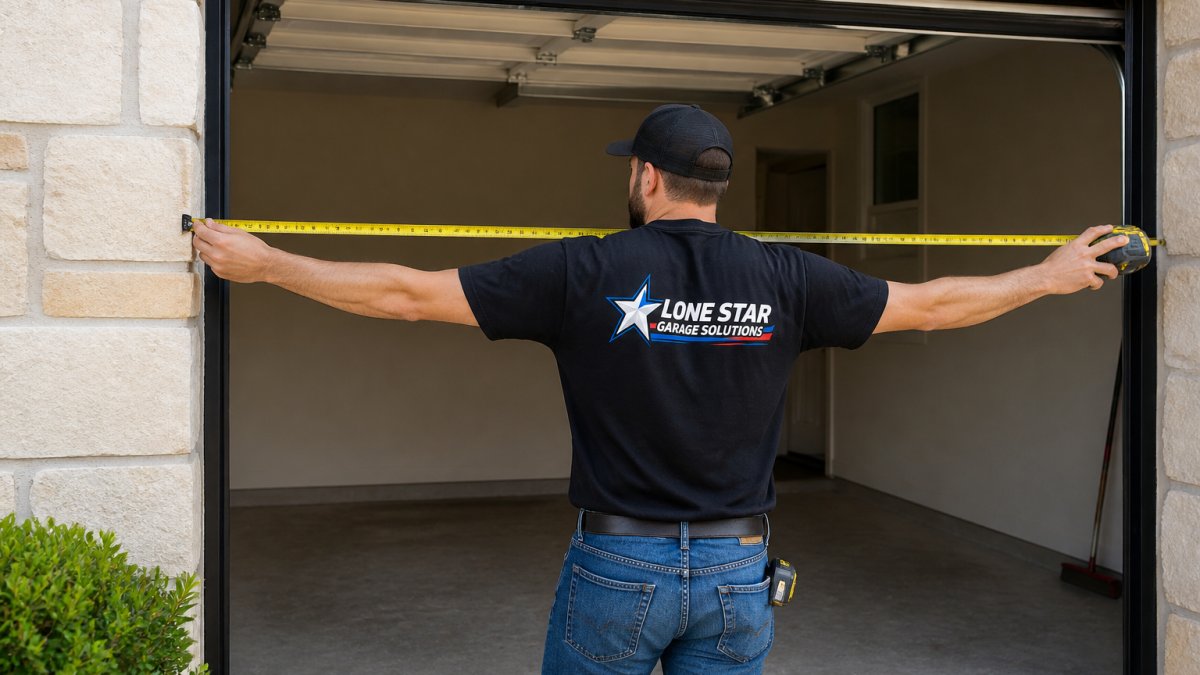
How to Measure Width at Multiple Points
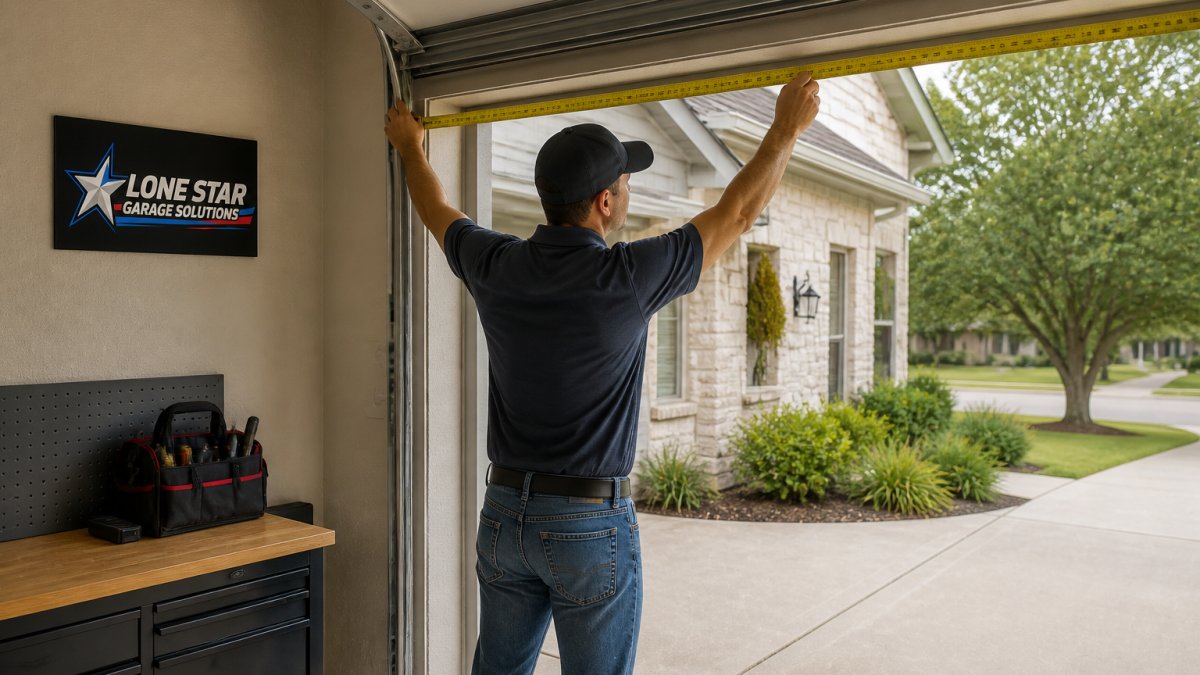
Measure the width at three locations: top, middle, and bottom of the opening. Garage openings aren't always perfectly rectangular, especially in older homes or where the foundation has settled slightly.
Start at the top: place your tape at the left edge of the opening (inside the jamb), extend it level and snug to the right edge, and write down the number.
Repeat at the middle and bottom. If they differ, note the smallest width, that's your working dimension, because the screen must fit the tightest point.
Common mistakes happen here:
- Measuring only at one point and assuming the opening is uniform
- Holding the tape at an angle instead of level
- Not accounting for trim or molding that might protrude into the opening
How to Measure Height and Check for Square
Height follows the same logic: measure at the left, center, and right, from the floor to the top of the opening where the header meets the jamb.
Record all three and note the smallest.
Now check for square. Measure both diagonals. If they differ by more than half an inch, the opening is out of square and you'll need to account for that during installation.
Garage Door Screen Measurements: Checking Clearance Above and Around
Width and height tell you how big the screen is; clearance tells you whether it can be mounted and operated. This is where most measuring mistakes happen.
Work through the four clearance zones below in order, recording each and photographing anything that protrudes into a zone.
Zone 1: Headroom Above the Opening
Headroom is the vertical distance from the header to the first obstruction above it, ceiling, opener rail, torsion tube, ductwork, or conduit.
Measure headroom above the left jamb, center, and right jamb, and use the smallest.
The garage door opener rail and its brackets often intrude into this zone. Note the lowest point of the rail above the header and its horizontal offset from center.
Zone 2: Side Clearance at the Jambs
Side clearance is the horizontal distance from each side of the opening to the nearest wall, return, or obstacle. The tracks run vertically along the jambs, so this zone must be clear for the full height of the opening.
Measure side clearance at the top, middle, and bottom on both sides, using the smallest number per side. Then check jamb return depth, a shallow return limits track fastening and may push you toward an outside-mount.
Watch for these common intruders on the jamb faces:
- Electrical outlets, switches, and conduit
- Garage door hinges and roller brackets that protrude past the jamb
- Weatherstripping and stop molding
- Shelving, pegboard, or wall-mounted brackets within the track path
Zone 3: The Track Path and Floor Line
The tracks need a straight, unobstructed vertical path from header to floor. Walk each jamb and note any point where an object projects more than about a quarter inch into the opening plane, even a small protrusion can cause binding or gaps.
At the floor, measure level at the left, center, and right. If the floor slopes or has a raised threshold, note the total variation across the width. A flexible sweep absorbs minor variation; a large step or slope may require a different seal approach.
Zone 4: Vehicle and Door Swing Clearance
Finally, measure the clear distance from the opening plane inward to any parked vehicle, workbench, or stored equipment.
Also note the swing arc of any adjacent door, a man-door swinging toward the opening or an interior door opening into the track path. These are easy to overlook and hard to fix after mounting.
With all four zones recorded, bring those numbers to your installer, they determine housing position, track fastening, and whether an inside-mount or outside-mount is the better fit.
Retractable Garage Screen Clearance: Accounting for Tracks and Hardware
Tracks and mounting hardware need their own clearance along the sides of the opening.
Check the jambs for obstructions, outlets, switches, or hardware. If your garage door opener has side-mounted components, note their exact location and size.
Measure jamb depth. Deeper jambs give more surface area for mounting hardware; shallow jambs limit your options.
Also inspect the floor along the base of the opening for raised thresholds, weatherstripping, or debris that could interfere with the bottom rail.
Garage Screen Mounting Space: Inside-Mount vs. Outside-Mount
Your opening might accept an inside-mount, an outside-mount, or both. Understanding the difference helps you choose.
Inside-Mount Measurement Considerations
An inside-mount screen sits within the opening, with tracks mounted to the interior jambs. It works well with adequate jamb depth and gives a clean, integrated look.
Check that both jambs are straight and plumb. Jambs that bow significantly can cause binding or gaps, and an inside-mount may not work well.
Verify the jambs are solid enough to support mounting hardware, tap along them for hollow spots.
Outside-Mount Measurement Considerations
An outside-mount screen sits on the exterior of the opening, with tracks mounted to the wall or door frame.
Also note whether the door frame is flush with the wall or protrudes, the frame profile affects how tracks attach and how the screen seals.
Outside-mount installations offer flexibility but need adequate surrounding wall space; a garage in a tight corner may not be feasible.
Handling Uneven Floors and Out-of-Square Openings
Not every garage opening is perfect. Many have slightly uneven floors, walls that aren't quite plumb, or openings that are out of square.
An uneven floor can cause the bottom rail to bind or gap. Measure floor level at multiple points.
Out-of-square openings create gaps between the screen and the opening edges, letting bugs and debris bypass the screen.
Professional installers handle uneven and out-of-square openings regularly. The key is identifying them early so adjustments can be planned.
Recording Your Measurements and Next Steps
When you measure garage retractable screens, a measurement is only useful if it's recorded in a way the installer or manufacturer can act on. The goal is a single, unambiguous record: one width, one height, one mounting method, and a short list of conditions that affect fit. Use the table below as your master record, then apply the reporting rules that follow.
| Measurement | Where to take it | Value | Notes |
|---|---|---|---|
| Width, top | Left jamb to right jamb, level | ___ | Snug, no sag |
| Width, middle | Left jamb to right jamb, level | ___ | Snug, no sag |
| Width, bottom | Left jamb to right jamb, level | ___ | Snug, no sag |
| Height, left | Floor to header | ___ | From finished floor |
| Height, center | Floor to header | ___ | From finished floor |
| Height, right | Floor to header | ___ | From finished floor |
| Diagonal A | Top-left to bottom-right | ___ | Square check |
| Diagonal B | Top-right to bottom-left | ___ | Square check |
| Headroom | Header to lowest obstruction | ___ | Left, center, right |
| Side clearance, left | Opening to nearest obstacle | ___ | Top, middle, bottom |
| Side clearance, right | Opening to nearest obstacle | ___ | Top, middle, bottom |
| Jamb depth | Face of jamb to wall | ___ | Both sides |
| Floor variation | Across opening width | ___ | Level or sloped |
| Mounting method | Inside or outside | ___ | See rule below |
The Reporting Rule: Submit the Smallest Dimension
For width and height, submit the smallest of your three readings. A screen sized to the widest or tallest point won't fit the tightest point and will bind, gap, or fail to latch.
For the square check, compare the two diagonals. If they differ by more than about half an inch, flag the opening as out of square. Don't average them, report both and let the installer decide how to compensate.
Worked Example
Suppose your readings come back like this:
- Width: top 95 1/2 inches, middle 95 1/4 inches, bottom 95 3/8 inches
- Height: left 83 inches, center 83 1/4 inches, right 83 1/8 inches
- Diagonals: 126 1/2 inches and 126 3/4 inches
You would report a width of 95 1/4 inches and a height of 83 inches (both the smallest readings). The diagonals differ by 1/4 inch, within the half-inch tolerance, so the opening is effectively square.
Reporting Inside-Mount Versus Outside-Mount
Record which mounting method you're measuring for, because the dimensions differ:
- Inside-mount: report the clear opening width and height (jamb to jamb, floor to header), plus the jamb depth on both sides. The screen fits within the opening, so the opening dimensions are the governing numbers.
- Outside-mount: report the clear opening dimensions plus the surrounding wall space on each side and above the opening. The screen mounts to the face of the wall, so the wall space is what determines whether the tracks and housing can be fastened.
If you're unsure which method your opening supports, record both sets of numbers so the installer can confirm against your clearance readings.
What Else to Include
- Photos of the opening from straight on, plus close-ups of any obstruction you noted
- A note on floor condition (level, sloped, raised threshold)
- A note on jamb condition (solid, hollow, bowed, damaged)
- The date you measured, in case the opening changes before installation
When your record is complete, contact Lone Star Garage Solutions with your measurements. We'll review them, confirm whether an inside-mount or outside-mount is the better fit, and provide a quote for a Lifestyle garage screen or Templar motorized patio screen based on your actual dimensions. Accurate measurements now keep the installation smooth and the screen operating properly for years.
Frequently Asked Questions
How do you measure a garage door opening for a retractable screen?
Measure the width at three points (top, middle, bottom) and the height at three points (left, center, right) using a metal tape measure. Record the smallest width and smallest height, these are your actual opening dimensions. Use these measurements when ordering your retractable screen to ensure proper fit and coverage.
What clearance is needed above a garage door for a retractable screen?
Most retractable garage screens require 12-18 inches of headroom above the garage door opening for the track assembly and motorized mechanism. Measure from the top of your garage opening to any ceiling obstruction, header, or soffit. If you have limited headroom, discuss this with your installer, some systems can be mounted outside the frame instead.
Can a retractable garage screen fit behind an existing garage door?
Yes, if you have sufficient clearance. The screen mounts either inside the opening or on the exterior frame. Inside-mount requires more headroom; outside-mount can work with tighter spaces. Measure your available mounting space carefully and verify that the garage door opener hardware won't interfere with the screen track when the door operates.
Should you measure the width at the top, middle, and bottom of the opening?
Yes. Most garage openings are slightly out-of-square due to settling or uneven construction. Measuring at three heights reveals the narrowest point, which determines your screen width. Use the smallest measurement to guarantee the screen fits without gaps or binding during operation.
Measuring your garage correctly is the difference between a screen that works beautifully and one that frustrates you every time you use it. Take your time, use the right tools, and don't skip the clearance checks. When you're ready to move forward, Lone Star Garage Solutions is here to help with professional installation and support. Reach out for a quote and let's transform your garage into a comfortable, bug-free space.