
 how-to
How to Cool Down a Hot Garage: 7 Proven Methods
Table of Contents
- Why Your Garage Traps Heat
- Step 1: Seal Gaps and Weatherstripping to Stop Air Leakage
- Step 2: Insulating Garage Doors and Walls for Heat Retention Control
- Step 3: Install Garage Ventilation Systems for Airflow
- Step 4: Add Reflective Insulation and Radiant Barriers
- Step 5: Choose Active Cooling: Mini-Splits, Portable AC, and Evaporative Coolers
- Step 6: Use Retractable Garage Screens for Shade and Cross-Ventilation
- Step 7: Control Moisture and Manage Energy Consumption
- Climate-Specific Recommendations
- HOA and Rental-Friendly Solutions
- Cost-Benefit Analysis of Cooling Methods
- Safety and Fire Hazards
- Frequently Asked Questions
Last Updated: September 15, 2026
Why Your Garage Traps Heat
A garage gets hot because it is a large, poorly insulated box with a thin, sun-facing door and almost no airflow, in Texas, an oven by mid-afternoon. Most were never built as living space: uninsulated walls, no ceiling insulation, and a stamped steel door that soaks up radiant heat all day. Add a west- or south-facing wall and it runs hotter than the house attached to it.
The result goes beyond discomfort: heat degrades stored items, stresses your HVAC system when the garage connects to the house, and makes the space unusable for a workshop or gym. This guide walks through seven methods for how to cool down a hot garage, from cheap weekend fixes to active cooling systems that need professional installation.
Step 1: Seal Gaps and Weatherstripping to Stop Air Leakage
Sealing gaps is the cheapest first step and delivers the fastest return. Air leakage around the door and wall penetrations lets hot outside air pour in all day.
Walk the perimeter of your garage door and feel for drafts at the bottom seal, side jambs, and top header. A worn bottom seal alone can leave a visible gap along the entire door width.
Here is what to check:
- Bottom weatherstripping: replace it if it is cracked, flattened, or missing
- Side and top seals: confirm they contact the door evenly when closed
- Wall penetrations: seal gaps around pipes, wiring, and vents with exterior-grade caulk
- Door-to-frame gaps: add a threshold seal if daylight shows through
The DOE guidance on air sealing explains how uncontrolled air movement drives up both heat gain and energy consumption. A common mistake is sealing the door but ignoring the shared wall to the house, where gaps let hot air migrate indoors.
Step 2: Insulating Garage Doors and Walls for Heat Retention Control
Insulating garage doors and walls is the highest-impact upgrade for most homes. A door insulation kit adds an R-value layer that blocks heat transfer through the largest, thinnest surface in the room.
R-value measures thermal resistance: the higher the number, the better the material blocks heat flow. An uninsulated steel door sits near R-1; a rigid foam kit pushes it to R-8 to R-12 (energy.gov).
For walls, fiberglass batts or rigid foam panels work well, but watch thermal bridging, the path heat takes through studs and framing that bypasses your insulation.
If your door is old, dented, or has failing hardware, replacement often beats retrofitting. If your door is old, dented, or has failing hardware, replacement often beats retrofitting. Lone Star Garage Solutions installs insulated doors built for the Texas climate, with flexible financing available on qualifying projects.
Step 3: Install Garage Ventilation Systems for Airflow
Garage ventilation systems move hot, stale air out and pull cooler air in.
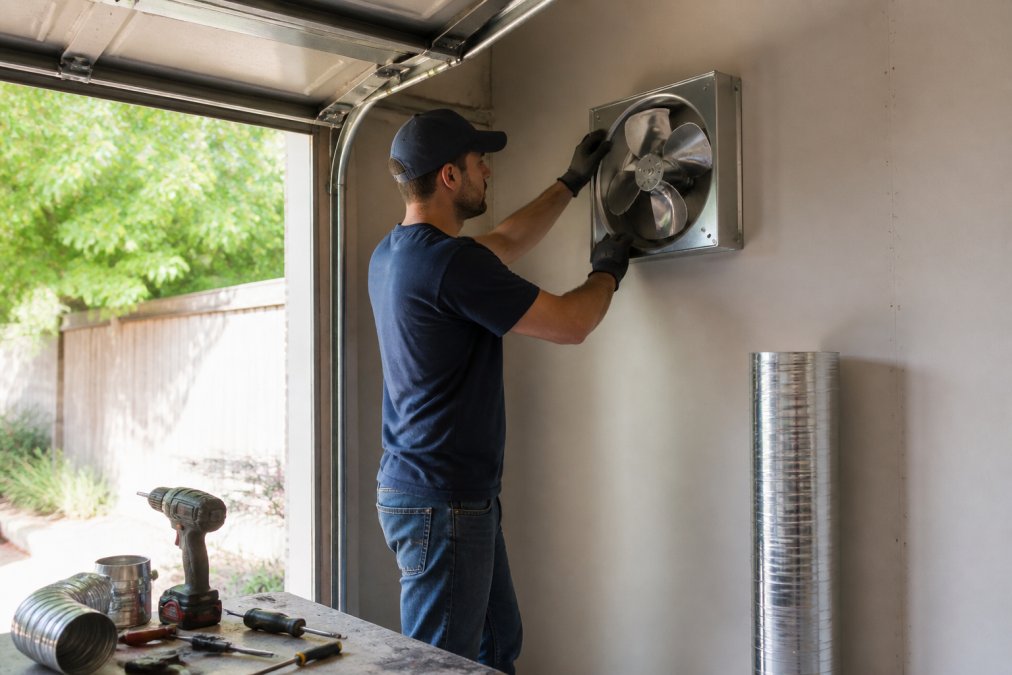
Two approaches work in most homes:
- Exhaust fans pull hot air out through a wall or roof vent. Size the fan to your garage's cubic footage so it turns the air over several times per hour.
- Cross-ventilation pairs an intake on one side with an exhaust on the other, creating a steady flow path.
Attic ventilation matters too: if the space above your garage traps heat, it radiates straight down. A ridge vent or powered attic fan relieves that pressure.
The Home Ventilating Institute publishes certified airflow ratings for exhaust products, which helps you compare fans on real performance rather than marketing claims.
Step 4: Add Reflective Insulation and Radiant Barriers
A radiant barrier blocks heat before it enters rather than slowing it after it arrives, the key distinction from thermal insulation. These reflective foil surfaces, usually installed on the underside of the roof or the inside face of the door, reflect radiant heat back toward its source instead of absorbing it. In a Texas garage with a sun-baked roof, that difference is significant.
Where radiant barriers work best:
- Under the roof deck in an unconditioned attic above the garage
- On the inside panel of a south- or west-facing garage door
- Along sun-exposed walls that receive direct afternoon light
Combine a radiant barrier with traditional insulation: the barrier handles radiant heat, the insulation handles conduction and convection, and neither replaces the other.
Step 5: Choose Active Cooling: Mini-Splits, Portable AC, and Evaporative Coolers
Active cooling is the only method that lets you set a target temperature and hold it; passive measures only reduce heat gain. But "active cooling" is three different machines with different physics, and picking the wrong one wastes money no amount of insulation can fix.
| Method | Best For | Key Consideration |
|---|---|---|
| Mini-split (ductless air conditioner) | Year-round use, workshops, gyms, home offices | Needs professional install and a dedicated circuit; sized by BTU rating and rated by SEER2 |
| Portable AC unit | Renters, small single-bay garages, temporary setups | Single-hose vs. dual-hose changes real cooling capacity; needs venting and condensate management |
| Evaporative cooler (swamp cooler) | Dry, low-humidity climates only | Adds moisture to the air; performance collapses as relative humidity climbs |
Sizing comes before shopping
Every unit is rated in BTUs per hour, and the rating only helps if it matches the space. A rough rule is about 20 BTU per square foot for a typical insulated room, adjusted upward for an uninsulated door, a west- or south-facing wall, a hot roof, and parked vehicles. A 400-500 sq ft single-bay garage often lands at 10,000-14,000 BTU before those penalties; a two-car garage frequently needs 18,000 BTU or more. Oversizing is not a safety margin, it short-cycles, fails to pull humidity out, and wears the compressor faster.
Mini-splits: the only option that holds a setpoint year-round
A ductless mini-split runs on a small refrigerant line set through a wall, needs no ductwork, and provides both cooling and heating, the same unit that cools in July takes the chill off in January. Two specs drive the decision:
- BTU capacity, match it to the space using the sizing logic above, not the unit's marketing "covers up to" claim.
- SEER2 rating, the current federal efficiency metric for central and ductless air conditioners. Higher SEER2 means lower electricity draw per unit of cooling.
Installation requires a licensed technician, a dedicated circuit, and a condensate path, upfront cost that makes sense when the garage is used daily, not for a space you open twice a month.
Portable AC units: read the hose count
Portable units are the flexible choice for renters and small single-bay garages, but the category hides a big performance gap. A single-hose portable pulls room air across the condenser and blows it outside, depressurizing the garage and pulling hot outside air back in through every unsealed gap. A dual-hose unit draws outside air in for the condenser and exhausts it separately, so it behaves like its BTU label suggests.
Both types produce condensate: some drain to a hose, some collect in a tank, and some evaporate it with a sling fan, which adds humidity back into the space and works against you in a humid climate.
Evaporative coolers: only where the air is dry
An evaporative cooler, a swamp cooler, cools by pulling air through a wet pad, so its performance depends on how much moisture the air can still absorb.
Step 6: Use Retractable Garage Screens for Shade and Cross-Ventilation
Step 7: Control Moisture and Manage Energy Consumption
To manage energy consumption:
Climate-Specific Recommendations
HOA and Rental-Friendly Solutions
Cost-Benefit Analysis of Cooling Methods
Separate one-time cost from ongoing cost
Cooling methods split into two spending patterns:
Estimate the electricity cost before you commit
The passive-first payback rule
When active cooling is worth it
Safety and Fire Hazards
Keep these points in mind:
Frequently Asked Questions
Why is my garage so hot in the summer?
Garages trap heat because they usually lack insulation, ventilation, and conditioned air. The roof and door absorb solar radiation, and without a radiant barrier or airflow, that heat builds up inside. Sealing gaps and adding insulation panels or an exhaust fan helps reduce heat gain and lower the ambient temperature.
Is it worth putting AC in a garage?
It depends on how you use the space. A mini-split or portable AC unit works well if the garage is insulated and sealed, but running one in a leaky garage wastes energy. For occasional use, an evaporative cooler or exhaust fan may be enough. Weigh the upfront cost against how often you need climate control before committing.
How to ventilate a hot garage?
Cross-ventilation is the most efficient approach. Open the garage door slightly and place a box fan or exhaust fan at the opposite end to pull hot air out. Attic ventilation and a dedicated garage ventilation system move air continuously. Pair ventilation with weatherstripping to keep cool air from escaping through gaps.
Can a retractable screen help lower garage temperatures?
Yes. Retractable garage screens block direct sunlight while allowing cross-ventilation, which reduces heat gain without sealing the space shut. They are also HOA-friendly because they disappear when not in use. Combined with a fan or exhaust system, screens can noticeably lower the felt temperature inside the garage.