
 blog
blog
Epoxy vs Polyaspartic Garage Flooring: Which Wins in 2026?
Table of Contents
- Epoxy vs Polyaspartic Garage Flooring: The Short Answer
- Durability of Epoxy vs Polyaspartic: How Each Coating Ages
- Polyaspartic Floor Coating Installation Time and Curing
- Garage Floor Coating Cost Per Square Foot: What Drives the Price
- The Hybrid System: Epoxy Base Coat With Polyaspartic Top Coat
- Concrete Preparation: The Step That Decides How Long Your Floor Lasts
- Climate, Maintenance, and Repairability: What Texas Garages Demand
- Conclusion
- Frequently Asked Questions
Last Updated: September 14, 2026
Epoxy vs Polyaspartic Garage Flooring: The Short Answer
Epoxy vs polyaspartic garage flooring comes down to a simple trade-off: epoxy delivers a thicker, more affordable build with excellent chemical resistance, while polyaspartic cures fast, resists UV yellowing, and handles temperature swings without becoming brittle. The best-performing floors usually combine both. This guide from Lone Star Garage Solutions breaks down durability, curing time, cost factors, and the hybrid system that most high-performance garages now use.
Epoxy flooring is a thermoset coating made from resin and hardener that cures into a rigid, chemical-resistant surface. Polyaspartic flooring is a faster-curing polyurea coating known for UV stability and flexibility. Both bond to prepared concrete, but they age very differently.
Here's the part most guides get wrong: the question isn't which product is "better." It's which one fits your climate, your timeline, and how you actually use the slab.
The comparison below covers the six factors that decide real-world performance.
| Factor | Epoxy | Polyaspartic |
|---|---|---|
| Cure time | 12-24 hours per coat | 1-4 hours per coat |
| UV stability | Yellows over time | Resists yellowing |
| Flexibility | Rigid, can crack | Flexible, handles thermal shock |
| Chemical resistance | Excellent | Very good |
| Cost | Lower per square foot | Higher per square foot |
| Best for | Base coats, budget builds | Top coats, fast turnarounds |
Durability of Epoxy vs Polyaspartic: How Each Coating Ages
The durability of epoxy vs polyaspartic depends less on brand and more on where each coating sits in the system. Epoxy wins on tensile strength and chemical resistance. Polyaspartic wins on flexibility and UV stability.
UV Stability and Yellowing
Epoxy's aromatic chemistry breaks down under sunlight, causing the amber tint that shows up on garage aprons and driveway-facing slabs (pubmed.ncbi.nlm.nih.gov). Polyaspartic uses aliphatic chemistry, which resists that shift. If your garage door stays open during the day, this matters.
Impact, Abrasion, and Hot Tire Resistance
Hot tire pickup is the classic epoxy failure: warm tires soften the coating and lift it in patches. A properly cured epoxy base with a polyaspartic top coat resists this far better than either product alone. Abrasion resistance improves when the top coat carries a broadcast aggregate.
Polyaspartic Floor Coating Installation Time and Curing
Polyaspartic floor coating installation time is measured in hours, not days. A single coat cures in one to four hours depending on temperature and humidity, which means a full garage can often be coated and returned to service the same day. Epoxy needs 12 to 24 hours between coats and several days before it takes vehicle traffic.
That speed changes the project. A polyaspartic system can be applied as a base and top coat in one visit. An epoxy system usually requires a return trip. Pot life is shorter with polyaspartic, so the installer has to work in smaller mixed batches and move quickly.
Why the Cure Clocks Diverge
The two products cure by different mechanisms, and that is the root of every scheduling difference.
- Epoxy is a two-part thermoset. The resin and hardener react through an addition cure that builds cross-link density slowly. Full chemical resistance typically develops over 5 to 7 days at 70°F, and the floor should not take vehicle traffic until that window closes (pubmed.ncbi.nlm.nih.gov).
- Polyaspartic is a polyurea. The isocyanate and amine components react almost on contact, which is why a thin coat can be walkable in a couple of hours and drivable the same day. The trade-off is a working time measured in minutes, not hours.
How Temperature and Humidity Move the Schedule
Ambient conditions shift both products, but they shift polyaspartic harder.
- Below 60°F, polyaspartic cure slows sharply and can stay tacky for hours longer than the label suggests. Epoxy also slows, but its longer open time gives the installer more margin.
- Above 85°F, polyaspartic pot life can drop to under 10 minutes in the bucket. Installers respond by mixing smaller batches, keeping pails in shade, and rolling in tighter sections.
- High humidity accelerates polyaspartic's reaction with atmospheric moisture and can cause amine blush or hazing on the surface. Epoxy is more forgiving of humidity during application but more sensitive to moisture vapor coming up through the slab.
This is the part most comparisons skip: a cure schedule printed on a product data sheet assumes 70°F and 50% relative humidity. Real garages rarely sit there. In hot, humid summers, polyaspartic can cure faster than the installer can broadcast flake into it. In cold snaps, the same product may need overnight before a recoat. The practical fix is to check slab temperature with an infrared thermometer, not air temperature, and to confirm the manufacturer's minimum and maximum application window before mixing.
What This Means for the Project Timeline
- One-day polyaspartic build: grind and prep in the morning, base coat by midday, flake broadcast, top coat in the afternoon, light traffic the same evening, vehicle traffic the next morning.
- Multi-day epoxy build: prep day one, base coat day one, recoat day two, top coat day three, vehicle traffic day five to seven.
- Hybrid build: epoxy base on day one, polyaspartic top coat the next morning once the base has set hard enough to walk on, vehicle traffic that evening.
The hybrid schedule is the reason it dominates high-performance installs. It captures polyaspartic's fast return-to-service without giving up epoxy's build thickness and chemical resistance.
Garage Floor Coating Cost Per Square Foot: What Drives the Price
Garage floor coating cost per square foot is driven by four variables: slab condition, square footage, coating system, and prep method. Larger slabs lower the per-foot rate because setup and mobilization spread across more area. Heavily cracked or oil-soaked concrete raises it, because diamond grinding and crack repair add labor.
System choice matters too. A single epoxy coat costs less than a hybrid build with a polyaspartic top. Pricing also varies by region and season, so the honest answer is that no two quotes land in the same place. Lone Star Garage Solutions provides project-specific quotes rather than flat rates, and financing is available on qualifying projects.
The Hybrid System: Epoxy Base Coat With Polyaspartic Top Coat
The hybrid system is the industry standard for high-performance garage floors: an epoxy base coat for build and chemical resistance, topped with polyaspartic for UV stability and fast return to service. It solves the weakness of each product by using the other where it performs best.
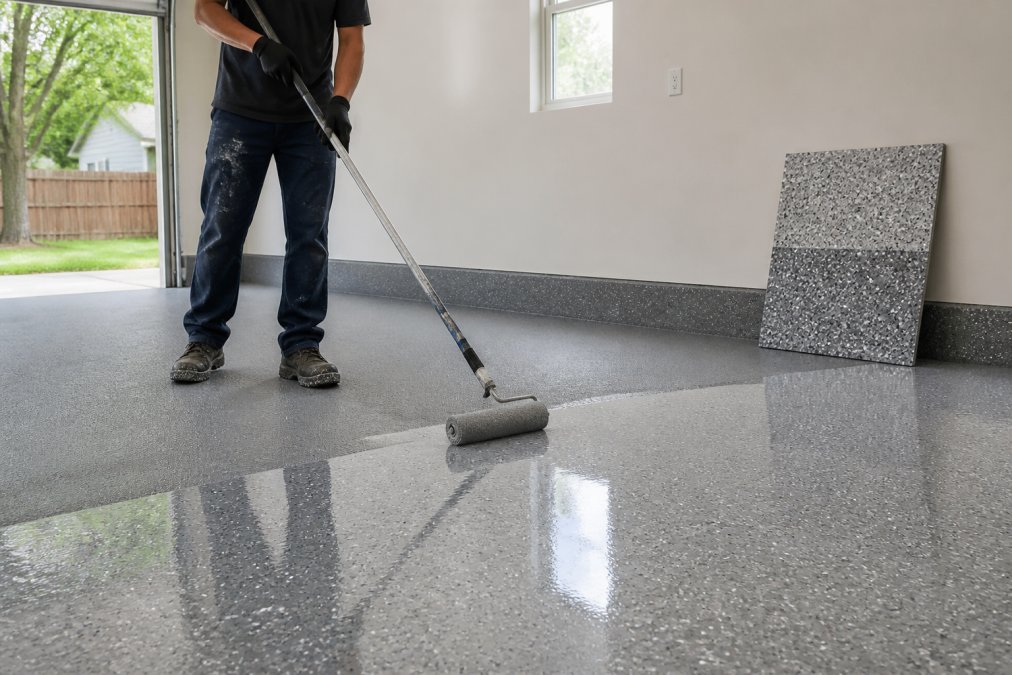
The base coat carries the color and the flake broadcast. The top coat seals it, protects against yellowing, and adds the abrasion resistance that keeps the finish looking new. In practice, this is a system often recommended for many garages.
Concrete Preparation: The Step That Decides How Long Your Floor Lasts
Substrate preparation decides whether a coating lasts five years or fifteen. Coating bonds to concrete mechanically, so the surface has to be opened up and cleaned before anything is poured.
- Diamond grinding profiles the slab and removes old sealer, paint, and surface contamination.
- Shot blasting strips heavier coatings and leaves a uniform anchor profile.
- Moisture testing confirms the slab is dry enough to accept a coating.
- Crack and spall repair fills voids so the coating doesn't bridge and fail.
- Oil and grease removal prevents adhesion failures at the source.
A common mistake is coating over a slab that "looks clean." Concrete prep is the difference between a floor that survives a decade of hot tires and one that peels in a year.
Climate, Maintenance, and Repairability: What Texas Garages Demand
Climate-specific performance is where most comparisons stop short. Garages swing between summer heat that softens undercured coatings and winter cold snaps that stress rigid ones. Thermal shock cracks brittle floors. Polyaspartic's elasticity handles that expansion and contraction; epoxy alone can't.
But the climate story is really a moisture story, and that is the part almost no comparison covers.
Moisture Testing: The Step That Predicts Failure
Concrete is porous, and every slab wicks moisture vapor from the soil below. If that vapor pressure exceeds what the coating can tolerate, the floor blisters, bubbles, or peels, regardless of whether the product is epoxy or polyaspartic. Two test methods are standard in the industry:
- Calcium chloride test (ASTM F1869): a dish of calcium chloride is sealed under a plastic dome on the slab for 60 to 72 hours (F1869 Standard Test Method for Measuring Moisture Vapor Emission Rate of Concrete...). The dish absorbs moisture vapor, and the result is reported in pounds of water per 1,000 square feet per 24 hours. Most coating manufacturers publish a maximum, commonly in the 3 to 5 lb range, above which a vapor barrier or moisture-mitigating primer is required.
- Relative humidity test (ASTM F2170): in-situ probes are drilled into the slab at a specified depth and left to equilibrate, then read with a meter. Results are reported as percent relative humidity. A common manufacturer threshold is 75% to 80% RH.
The two tests measure different things and can disagree. Calcium chloride measures vapor emission at the surface; the RH probe measures moisture inside the slab. Many installers run both on older slabs or slabs without a vapor barrier under them. Skipping this step is the single most common reason a coating fails in the first two years.
Long-Term Maintenance: What Actually Matters
Maintenance is simpler than most homeowners expect, but the details matter:
- Routine: sweep or dust-mop weekly, damp-mop monthly with a pH-neutral cleaner. Avoid citrus-based or solvent cleaners on polyaspartic top coats, they dull the gloss over time.
- Spills: wipe oil, brake fluid, and transmission fluid within a few hours. Epoxy handles short exposure well; prolonged contact with hot solvents can stain either finish.
- Winter: road salt and de-icing brine are the main long-term threats. Rinse the floor after the season ends. Both coatings resist salt, but salt residue left in place can abrade the top coat under tire traffic.
- Gloss retention: polyaspartic top coats hold gloss noticeably longer than epoxy under UV exposure. Epoxy-only floors on a sun-facing apron often show ambering within 12 to 24 months.
Repairability: Patching a Floor Five to Ten Years Later
This is the section most guides skip entirely, and it is where the hybrid system earns its keep.
- Scuffs and isolated damage on a hybrid floor: scuff the affected area with 80- to 120-grit sandpaper to break the gloss, clean with a solvent wipe, and recoat with polyaspartic. The patch blends because the top coat is the same material. No grinding back to bare concrete is required.
- Damage that reaches the epoxy base: grind the affected area down to sound coating, re-prime if bare concrete is exposed, rebuild the epoxy base, broadcast flake to match, then top coat. Color and flake matching is the hard part, save leftover flake from the original install.
- Epoxy-only floor with UV yellowing: the fix is a full recoat. You cannot spot-repair yellowing because the color shift is uniform across the slab. This is the single biggest long-term cost advantage of a polyaspartic top coat.
- Full recoat window: most hybrid floors can be recoated after 7 to 10 years of residential use by scuffing the top coat and applying a fresh polyaspartic layer. No full removal is needed unless the base has delaminated.
Conclusion
Choosing between epoxy and polyaspartic garage flooring isn't a coin flip. Match the system to your climate, your timeline, and how the slab gets used, and the floor holds up for years. Lone Star Garage Solutions specializes in finishes tailored for the Texas climate, with same-day repair services, flexible financing on qualifying projects, and a clear, low-stress process from quote to final coat. Get a Quote and let our team provide recommendations for your garage.
Frequently Asked Questions
What are the downsides of polyaspartic floor coating?
Polyaspartic cures fast, which is its biggest advantage and its main drawback. Installers get a short pot life, so the material has to be mixed and rolled out in small batches without delay. It also costs more per square foot than a standard epoxy system. On top of that, a polyaspartic floor demands a properly prepared substrate. If the concrete has not been diamond ground or shot blasted and any moisture issues have not been addressed, the coating can peel regardless of how good the product is.
What is the cost difference between epoxy and polyaspartic coatings?
Polyaspartic coatings generally run higher per square foot than epoxy because the material costs more and a full polyaspartic system often requires more prep work. A hybrid floor, with an epoxy base coat and a polyaspartic top coat, lands between the two and is the setup most installers recommend for a garage. Final pricing depends on square footage, concrete condition, flake or quartz finish, and whether the slab needs repairs. Get a written quote based on your actual garage rather than a nationwide average.
How long does it take for polyaspartic flooring to cure compared to epoxy?
Polyaspartic floor coating installation time is measured in hours, not days. A polyaspartic top coat can accept foot traffic in about 4 to 6 hours and vehicle traffic in roughly 24 hours. Epoxy needs 12 to 24 hours before foot traffic and 48 to 72 hours before you park on it, and it also needs longer between coats. That shorter cure window is why polyaspartic systems are often finished in a single day, which matters if you cannot leave the garage empty for a week.
Does epoxy or polyaspartic hold up better in Texas heat and humidity?
Polyaspartic handles heat and UV exposure better. It resists yellowing and stays flexible across temperature swings, while standard epoxy can chalk or amber when sunlight reaches it and becomes more brittle over time. Humidity matters for both, but it matters most during application. Moisture vapor rising through a slab will push a coating off the concrete if the slab is not tested and prepped correctly. In this climate, that prep step separates a floor that lasts from one that bubbles within a couple of years.