
 how-to
Why Garage Doors Stick in Texas Heat: 2026 Fix Guide
Table of Contents
- Why Texas Heat Makes Garage Doors Stick
- Thermal Expansion and Metal Fatigue
- Humidity vs. Dry Heat: Two Different Problems
- What You'll Need Before You Start
- Step 1: Lubricating Garage Door Tracks for Summer
- Step 2: Garage Door Sensor Alignment in Heat
- Step 3: Check Springs, Cables, and Door Balance
- Step 4: How to Choose a Garage Ventilation Fan
- Step 5: Seal, Insulate, and Protect Your Door
- Common Mistakes to Avoid
- Frequently Asked Questions
Last Updated: September 23, 2026
Why Texas Heat Makes Garage Doors Stick
If your garage door sticks in Texas heat, the cause is usually thermal expansion, dried-out lubricant, or a bottom weather seal softened and bonded to the concrete. This guide from Lone Star Garage Solutions walks through the fixes in order, from lubrication to sensor calibration and spring checks.
Thermal Expansion and Metal Fatigue
Why garage doors stick in Texas heat comes down to physics. Metal expands as it warms, so a steel panel that fits perfectly at 70 degrees can swell enough at 105 degrees to bind against its tracks.
Humidity vs. Dry Heat: Two Different Problems
Humidity and dry heat cause garage doors to stick in different ways, and treating them the same wastes time. In Central Texas you often get both in one season.
So the fix depends on what you're dealing with:
- Sticky, gummy residue: humidity problem, clean and re-seal
- Dry, squeaky grinding: dry heat problem, re-lubricate
- Both at once: clean first, then lubricate
What You'll Need Before You Start
Gather these before you climb a ladder. Most are available at any hardware store.
- Silicone-based lubricant (not WD-40)
- A small brush or rag
- A level
- A screwdriver set
- Work gloves
- A step ladder
Step 1: Lubricating Garage Door Tracks for Summer
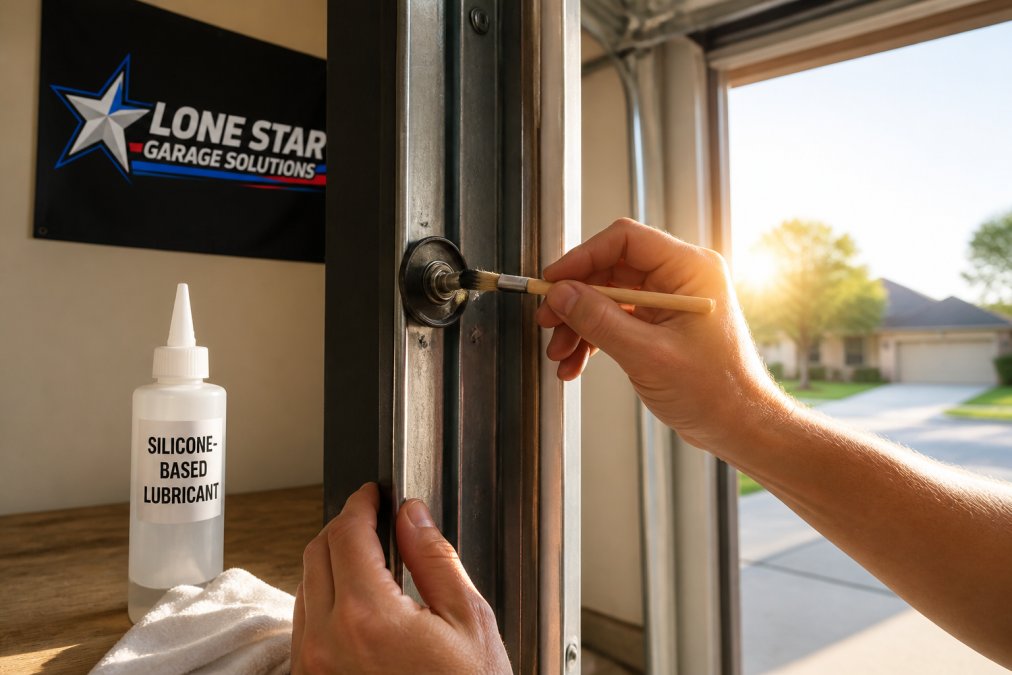
Lubricating garage door tracks for summer is the highest-value fix for a sticking door. Clean the tracks first, then apply a thin coat of silicone-based lubricant to tracks, rollers, and hinges.
Which Lubricant to Use (and Which to Avoid)
Silicone-based lubricant is right for tracks and rollers: it resists heat, doesn't attract dust, and won't gum up in cold weather.
Avoid these:
- WD-40: a solvent, not a lubricant. It strips existing grease and evaporates.
- Heavy grease: attracts grit and thickens in cold weather.
- Cooking spray: works for a week, then turns sticky.
Step 2: Garage Door Sensor Alignment in Heat
Garage door sensor alignment in heat matters because the metal brackets holding your safety sensors expand and shift as the garage warms. A sensor off by a fraction of an inch can break the infrared beam and stop your door mid-cycle, or refuse to close. Most homeowners blame the opener when the real problem is a sensor that drifted out of alignment on a hot afternoon.
How the Safety Eyes Actually Work
Every modern opener uses photo-eye sensors mounted about 6 inches off the floor on each side of the door. One emits an infrared beam; the other receives it. If the beam is broken, by misalignment, dirt, cobwebs, or an object, the opener reverses or refuses to close. This is a required safety feature, so the door will not override a broken beam.
Reading the LED Diagnostics
Each sensor has a small LED indicator. The pattern tells you what is wrong:
- Both LEDs solid: beam is aligned and receiving.
- One or both blinking: beam is broken, misaligned, or the sensor is not getting power.
- One LED off entirely: check the wiring and the connection at the opener head.
Step-by-Step Sensor Calibration
Do this on a hot afternoon, not in cool morning air, alignment set at 8 a.m. can drift by 3 p.m.
- Kill the power. Unplug the opener or flip its breaker so the door cannot move while you work.
- Clean both lenses. A dry microfiber cloth removes dust and spiderwebs that scatter the beam.
- Loosen the wing nut or screw on the bracket of the sensor that is blinking. Do not remove it, just enough to let the sensor pivot.
- Aim the sensor slowly left, right, up, and down until its LED turns solid. Small movements only; the beam is narrow.
- Tighten the bracket while holding the sensor in place. Re-check the LED after tightening, it is easy to nudge it out of alignment.
- Repeat on the other side if its LED is also blinking.
- Restore power and test. Press the wall button to close the door. It should travel fully without reversing.
- Test the safety reverse. With the door closing, pass a broom handle through the beam. The door should reverse immediately. If it does not, realign and retest.
Sun Interference: The Afternoon Culprit
Direct afternoon sun hitting a receiver lens can blind it like glare blinds a camera, especially on west-facing garages. The symptom is a door that closes fine in the morning but reverses or refuses to close late in the day. A small shade, cardboard or a plastic visor clipped above the sensor, usually solves it without realignment.
Smart Opener Calibration and Force Limits
If the LEDs stay solid but the door still stops mid-cycle, the problem is likely the opener's logic board, a frayed sensor wire, or a mechanical bind in the tracks. That is when a professional diagnostic saves time.
Step 3: Check Springs, Cables, and Door Balance
Test door balance with the door closed:
- Pull the emergency release cord
- Lift the door by hand to about waist height
- Let go
Look for these signs of trouble:
- Gaps in the torsion spring coil
- Frayed or kinked cables
- A door that slams down instead of lowering smoothly
If you see broken springs or frayed cables, stop using the door. Lone Star Garage Solutions handles same-day spring and cable repairs across the New Braunfels area.
Step 4: How to Choose a Garage Ventilation Fan
A ventilation fan won't fix a sticking door, but it can reduce how often the problem returns by lowering the garage's ambient temperature. If your garage regularly climbs past 100°F in July and August, ventilation is a supporting fix, not a cure.
Here's how to size and choose one without overbuying.
Match CFM to Garage Volume, Not Just Square Footage
CFM (cubic feet per minute) is the fan's airflow rating. The common rule of thumb is to move the full volume of the garage roughly every 4 to 6 minutes. To estimate:
- Multiply length × width × ceiling height to get cubic feet. A typical two-car garage is about 20 ft × 20 ft × 9 ft, or roughly 3,600 cubic feet.
- Divide by your target minutes. At 5 minutes, that is about 720 CFM.
- Round up. A 750-850 CFM fan gives you margin for a hot day.
Noise, Mounting, and Controls
- Noise: rated in sones. Under 1.5 sones is quiet enough to talk over; above 3 sones you will notice it from inside the house.
- Mounting: wall-mounted units exhaust through an exterior wall and work well when you have a gable or side wall available. Ceiling-mounted units pair with a roof or soffit vent. Portable units need no install but block floor space.
- Controls: a thermostat or humidistat switch is worth the upgrade. It runs the fan only when the garage actually gets hot or muggy, instead of every time you flip a wall switch.
Pair Ventilation With Insulation and Sealing
If your door still sticks after lubrication, sensor checks, and ventilation improvements, the cause is likely mechanical, springs, cables, or the opener. That is the point to bring in a technician.
Step 5: Seal, Insulate, and Protect Your Door
Sealing and insulating your door reduces the heat that causes sticking and protects panels from heat-induced warping.
Common Mistakes to Avoid
Most sticking-door problems come back because of the same few mistakes.
- Using WD-40 as a lubricant. It cleans, it doesn't lubricate. The door sticks again within weeks.
- Over-lubricating the tracks. More lubricant means more grit. A thin coat is enough.
- Ignoring the bottom seal. A tacky seal is often the real cause, not the tracks.
- Forcing a binding door. This burns out the opener motor and can snap a cable.
- Adjusting springs without training. This is dangerous. Leave it to a pro.
| Problem | Likely Cause | Fix |
|---|---|---|
| Door groans and jerks | Dry tracks, worn rollers | Clean and lubricate |
| Door stops mid-cycle | Misaligned safety sensors | Realign sensors |
| Door won't stay open | Weak or broken springs | Call a pro |
| Seal sticks to floor | Softened rubber, humidity | Replace bottom seal |
| Opener strains to lift | Door out of balance | Check balance, adjust |
Frequently Asked Questions
Why won't my garage door close in hot weather?
Heat causes metal tracks to expand and shift slightly, which can misalign the safety sensors or create extra friction on the rollers. When the opener senses resistance, it reverses for safety and the door won't close. Lubricating tracks, checking sensor alignment, and testing door balance usually solves it. If the door still reverses above 100 degrees, a professional can check opener force settings and spring tension.
How does thermal expansion affect garage door tracks and rollers?
Metal tracks expand as ambient temperature climbs, and because they're bolted at fixed points, the expansion pushes them out of alignment. Rollers then bind against the track edges, increasing friction and operational resistance. Torsion springs also lose tension in heat, so the opener works harder. Regular lubrication and a quick track inspection before summer help prevent the sticking that thermal expansion causes.
Can high humidity in the summer cause garage doors to stick?
Yes. Along the Gulf Coast and in Central Texas, humid air condenses on cool metal tracks and springs overnight, then dries during the day. That cycle leaves behind rust and sticky residue that grabs the rollers. Rubber bottom weather seals also soften and stick to concrete. Silicone-based lubricant and a clean bottom seal reduce humidity-related sticking.
When should I call a professional for garage door repair?
Call a professional if the door is off its tracks, a torsion or extension spring is broken, cables are frayed, or the door won't stay balanced when you disengage the opener. These are dangerous repairs because springs and cables store extreme tension. For routine sticking, lubrication and sensor alignment are safe DIY steps. For anything involving springs, cables, or a door that won't open at all, contact a local garage door company for a quote.